This is a simple and short tutorial on how to attach a debugger to your Minecraft server in order to debug your plugins.
Preparing the server[]
The first thing we have to do is to add an argument to the server start commandline:
-agentlib:jdwp=transport=dt_socket,server=y,suspend=n,address=5005
This would go somewhere between java and -jar craftbukkit.jar in your start commandline. The value behind suspend= says whether java should wait for the debugger to connect before the Minecraft server starts. n for no, y for yes. The value behind address= is the port the JVM listens on for debuggers, you'll need this later.
Connecting the debugger from your IDE[]
General[]
Connecting the debugger to a remote JVM is quite similar across IDEs. Usually you have to create some kind of debug run configuration. You want to connect via socket, so you'll need the IP or hostname of the server (that would be 127.0.0.1 or localhost on your local machine) and the port. The port is specified in the start commandline with the newly added argument shown above. The number behind address= is the port (in the example above it's 5005} you have to use in your IDE to connect the debugger.
Eclipse[]
TODO
Netbeans[]
TODO
IntelliJ IDEA[]
IntelliJ uses the term remote debugging to describe this kind of debugging. You will need to set up a run/debug configuration for the purpose.
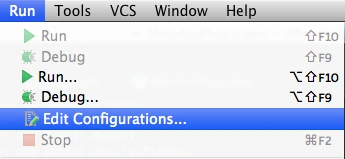
- From the menu bar, select Run, then Edit Configurations...
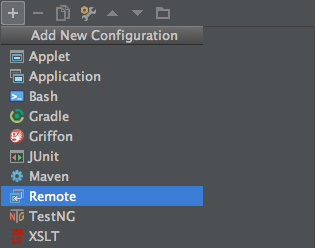
- In the Run/Debug Configurations window, click the + in the top left corner, and select Remote. This will create a new Remote configuration.
- Make sure the port number in the Port-field is correct (5005 if you followed the above example). Give the configuration a proper name, e.g. "Debug with Craftbukkit", and click OK.
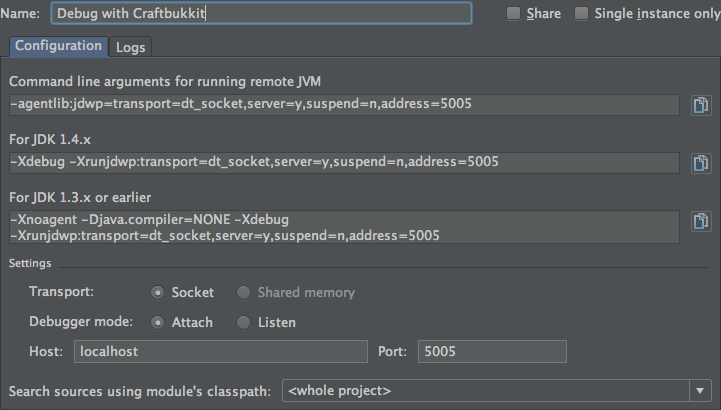
- Note that the field Command line arguments for running remote JVM contains the argument for your startup script. It should be identical to the argument presented at the top of this page.
- Your configuration is now ready. In the top right corner of the main IntelliJ window, in the navigation bar, you should see your configuration selected. If not, select it:
- Start up your server, and then click the Debug button (the green bug), which should bring up the Debug tab and report successful connection to the JVM running the server.
